Home Blog Page 2

Easy Authentic Pomodoro Sauce Recipe

0

This quick and easy classic Pomodoro sauce is loaded with rich tomato flavor and comes together in under 45 minutes. You won’t believe how simple this is to prepare and just how delicious and versatile this sauce is.

We love Italian food and eat pasta at least once a week. If you enjoy hearty pasta dishes as well, you must try Spaghetti Pasta Carbonara or Pasta alla Gricia (will post soon recipes).


pomodoro-1


Pomodoro Sauce

Pomodoro sauce is a very simple classic Italian tomato-based sauce recipe consisting of a few ingredients. Pomodoro translates from Italian to English as “tomato.” This is as basic a sauce as possible, and it comes together in about 45 minutes.

While this sauce is fantastic served with pasta, this is also the base sauce for things like Braciole or Chicken Parmesan. The reason pomodoro sauce is so good is that it only has a couple of ingredients. Just like any simple recipe, if the ingredients are in season and delicious, then your recipe will be outstanding.

In addition, when many of these classical recipes were created, the world was not wealthy. People used what they had, always in season, and tried to make the best food possible.


What’s the Difference Between Pomodoro Sauce and Marinara?

The most significant difference between Pomodoro sauce and marinara is the thickness. While marinara is chunkier, it is also a little runnier. Pomodoro sauce is completely smooth but thicker in nature because it cooks down over time.

In addition to those, the ingredients can vary as well. Marinara has a few more things, such as oregano and occasionally red pepper flakes.


Ingredients and Substitutions

  • Tomatoes – These can be canned tomatoes or fresh tomatoes. When using canned tomatoes, I prefer San Marzano.
  • Oil – Use a good extra virgin olive oil in this pomodoro sauce.
  • Garlic – Several finely minced cloves of garlic will help elevate this sauce.
  • Onions – These are optional but will significantly enhance the taste. You can use a yellow, white, or sweet onion.
  • Basil – You will need some fresh basil leaves to add to the sauce at the end.
  • Salt and Pepper – Using these simple ingredients will significantly increase the flavor. Be sure to season once and taste twice.


How to Make Pomodoro Sauce

Add the peeled or canned tomatoes to a blender or food mill and blend until pureed. Set aside.

pomodoro-2


Finely mince or grate some yellow onion and garlic cloves. Set aside.

pomodoro-3


Add some oil to a large pot over low heat.


Add the onions and garlic to the pot and cook over low heat for 10 minutes or until translucent.

pomodoro-5


Pour the pureed tomatoes and stew over low to medium heat for 30 minutes or until thick.

pomodoro-6


Finish the sauce with whole fresh basil leaves, salt, and pepper.

pomodoro-7


Serve with pasta which is known as pasta al pomodoro.

pomodoro-8


Is the Sauce Spicy?

Pomodoro sauce is not traditionally spicy. However, I have seen recipes where people finish with red pepper flakes. I believe you should customize your food to your liking, so if you would like a little spice in there, please feel free to add it in there.

It’s incredibly easy to make and delicious, making it a perfect weeknight sauce to cover your pasta.


Make-Ahead and Storage

Make-Ahead: You can make this recipe up to 2 days ahead. Follow the reheating instructions below when serving.

How to Store: Store the Pomodoro sauce chilled and covered in the refrigerator for up to 7 days. It freezes well and will hold in the freezer for up to 3 months. It will take a full day to thaw, so set aside enough time to use it.

How to Reheat: Simply add it to a medium-sized pot and cook over low heat until hot. Adjust seasonings with salt and pepper.


Chef Notes + Tips

  • Like any good sauce, it gets better with time, so if you’ve got the time, let this simmer for a few hours to help concentrate those rich tomato flavors.
  • While there are some differences between the two, they are subtle, so I want to encourage you to try both and see which one you like!
  • You can use fresh peeled tomatoes, which you can learn how to prepare in my steak pizzaiola recipe, or canned San Marzano tomatoes.
  • When it comes to olive oil, I use whatever is expeller pressed, organic, and on sale.

Easy Pasta Primavera Recipe

0

Pasta primavera is a delicious entrée loaded with fresh seasonal vegetables that are tossed with noodles and finished off with fresh herbs and cheese.


Pasta Primavera

I’m not sure there is a better recipe to get your family to eat vegetables then this. It’s incredibly simple to make for a quick weeknight meal and elegant enough to serve up to guests if you desire.

Pasta primavera is a simple pasta dish consisting of fresh seasonal vegetables that are sautéed and tossed with pasta and fresh herbs. Every single recipe looks different depending on what produce is available.


Why Is It Called Pasta Primavera

The word “primavera” translates from Italian to English as Spring. As I stated before seasonal cooking is the only way they do it in Italy and during springtime, what over those fresh vegetables were, is what’s in the pasta.


Ingredients and Substitutions

There are quite a few possibilities for this pasta, and here are some that you should consider adding to your pasta primavera:

  • Asparagus
  • Zucchini
  • Yellow Squash
  • Tomatoes
  • Mushrooms
  • Carrots
  • Onions
  • Garlic
  • Spinach
  • Fava Beans
  • Lima Beans
  • Peas
  • Bell Peppers
  • Broccoli
  • Beans


How to Make It

This is all about timing because some of the vegetables are firmer than the others require longer cooking times. Follow these quick procedures:

Cook the onions in olive oil over low heat until they are lightly browned and tender, about 6-8 minutes.

prima-1


Add in the carrots and mushrooms and cook for a further 4-5 minutes.

prima-2


Scoot the vegetables to one side of the pan and cook the garlic on the other side of the pan until lightly browned.

prima-3


Add in the remaining vegetables and season with salt and pepper.

prima-4


Toss with cooked pasta and serve.

prima-5


Is There a Sauce

There is no specific sauce for this recipe however this leaves it open to interpretation. I simply use some of the starchy pasta water to loosen up the pasta. You can use things like a Pomodoro Sauce and toss with the vegetables and pasta, or even a bechamel.


What Pasta Should I Use

Since I always seem to have leftover pasta, I always use that to get rid of it. However, you can use whatever noodle you like. Here are a few suggestions:

  • Fusilli
  • Farfalle
  • Penne
  • Orecchiette


Pasta Primavera Variations

Chicken Primavera – You can absolutely add chicken breasts or even some cut-up rotisserie chicken meat for protein to the pasta at the end when tossing the noodles with the vegetables.

Creamy Pasta Primavera – If you wish to make a creamy pasta primavera, simply start by making a classic alfredo sauce consisting of butter and parmesan cheese and toss with your cooked vegetables and noodles.


Make-Ahead and Storage

How to Reheat: Add your desired amount of pasta to a frying pan with a ½ cup of warm water and cook the pasta over low heat while moving the pasta around with a spoon until hot.

Make-Ahead: It is always best to make and serve this pasta immediately.

How to Store: Keep covered in the refrigerator for up to 3 days.


Chef Notes + Tips

Be sure to season the hot boiling water for the pasta with salt. A rule of thumb is that it should taste like the ocean.

You can substitute out the hot starchy pasta water with hot vegetable stock or chicken stock.

They say once you smell garlic while cooking, it’s done.


prima-6

Pho Dac Biet – A Glorious Vietnamese Dish [with Recipe]

0

Pho is the ultimate Vietnamese soup, while pho dac biet is beef pho. Pho dac biet has grown in popularity thanks to the various flavors that feature in the broth. This mouthwatering soup dish consists of rice noodles, broth, meat (usually beef), and herbs.

Pho dac biet is a Vietnamese translation for all kinds of special beef variations such as raw sliced steak, beef tripe, brisket, tendons, and Vietnamese meatballs. Being a popular food in Vietnam, pho is served in restaurants, street food, and households. Pho is a national dish of Vietnam and a specialty of several restaurant chains across the world.


pho-dac-biet-vietnamese


Pho Dac Biet Vietnamese (Origin and Curiosities)

Pho originated in Northern Vietnam in the early 20th century. The popularity of the dish spread across the world by the Vietnamese refugees after the Vietnam War. Due to poor documentation, there exist small disagreements over the cultural inputs that led to the development of the dish in Vietnam and the origin of the name.

The Saigon (southern) and Hanoi (northern) styles of pho vary in the sweetness of broth, choice of herbs, and the width of noodles.


A Brief History of Pho

Pho probably developed from similar noodle dishes. The modern pho emerged around 1900 to 1907 in Vietnam in Nam Dinh Province, located southeast of Hanoi. The origin and popularization of pho grew due to the intersection of several cultural and historical factors around the 20th century.

For example, the availability of beef attributed to French demand produced beef bones that the Chinese purchased to make a dish similar to pho. Workers from the provinces of Guangdong and Yunnan loved this dish because it resembled what they had from their homeland. Eventually, the dish became popular amongst the general population.

Pho was initially sold at dawn and dusk by itinerant street vendors who carried mobile kitchens on carrying poles.  Pho served with rare beef was introduced in 1930. Chicken pho emerged in 1939 probably because the markets did not sell beef on Mondays and Fridays. With the splitting of Vietnam in 1954, millions fled North Vietnam and headed for South Vietnam.

Pho, initially unpopular in the south, became popular. Variations in meat and broth emerged, and extra garnishes like bean sprouts, lime, cilantro, cinnamon basil, hoisin sauce, and hot chili sauce became a standard. During the Vietnam War, the Vietnamese refugees brought pho to many countries, including cities in the United States, Australia, and Canada.


Traditional Pho Dac Biet Cooks for Hours

Traditionally, pho requires anywhere between 6 to 16 hours of simmering the broth to develop the perfect taste. However, with a pressure cooker, you can prepare almost as good pho as the traditional one in just two hours.

The pressure cooker method works well because minimal moisture is lost during the cooking process, and pressure gets the flavors out of the ingredients. This implies that the broth does not get concentrated while cooking (or else it will become undesirable cloudy or dark)

[wprm-recipe-snippet]
pho-spices-and-noodles


Pho Spices and Noodles

Different foods and ingredients constitute pho dac biet. They include:


Noodles

Noodles are an integral part of pho dac biet. However, the noodles in pho differ from the regular kinds of noodles. They are high-quality rice noodles made using pristine white rice flour. These rice noodles are tender with a nice body.


The Bones and Meat

Pho dac biet is prepared using beef. The sorts of beef variations that go into pho include beef tripe, raw sliced steak, Vietnamese meatball, tendons, bones, flank, and oxtail.


The broth

You cannot have pho dac biet without the broth. People in Vietnam usually judge the quality of pho by its broth. A stall with a poor broth reputation will hardly stay open. A Quality broth is clear with an underlying earthiness brought about by the prolonged simmering of bones, tendons, and other meats. Another critical aspect of the broth is the spice and aromatics.


Herbs and Vegetables

In the standard pho dac biet, roasted or charred ginger and onions are the main vegetable constituents. Funnels can go in, but they tend to be more subtle. The herbs include Thai basil, fresh bean sprouts, Thai chili peppers, green onions, and cilantro. The herbs are best ripped up and sprinkled into the broth rather than submerged in the dish.


The spices

The spices that go into pho dac biet seasoning include coriander seeds, fennel seeds, whole cloves, Saigon cinnamon sticks, and black cardamom.


The sauce

It is common to have some sauces served with pho. Typical condiments include sriracha, hoisin, and fish sauce. In Vietnam, sauces as condiments are not a default (they are less prominent), and good broth is savored as served. Lime is also used.

pho-dac-biet-recipe


Pho Dac Biet Recipe

Ingredients


For the Broth

  • 20 cups boiling water (divided)
  • 2 lbs beef brisket (trim off fat)
  • 5 lbs beef bone marrow (alternatives include beef knuckle bones or neck bones)
  • 3 beef tendons
  • 4 tablespoon fish sauce
  • 2 sweet onions (sliced)
  • 4” ginger
  • 2 Oz rock sugar (approximately two big chunks)
  • 2 tablespoon salt


For the Noodles and Toppings

  • 3 lbs fresh pho noodles (You may use dry pho noodles)
  • 1 to 2 lbs steak (alternatives include sirloin, new York strips, or rib-eye)
  • 1 to 2 lbs beef tripe
  • 1 lb pho beef meatballs
  • 1 sweet onion (thinly sliced)
  • 1 lb fresh bean sprouts
  • 1 bunch green onion (finely chopped)
  • Fresh Thai basil (leaves only)
  • Cilantro
  • Hoisin sauce
  • 2 to 4 lime (sliced)
  • Sriracha sauce
  • 1 to 3 sliced Jalapeno (or red Chile Peppers)


For the Seasoning

  • 4 tablespoon coriander seeds
  • 2 tablespoon fennel seeds
  • 4 anise seeds
  • 2 Saigon cinnamon sticks
  • 1 tablespoon cloves (whole)
  • 1 black cardamom


Directions

Parboil Meat and Bones

  1. Clean and rinse the bone marrow, tendons, and brisket
  2. In a large pot, pour in 12 cups of water, bring to a boil, and then add the meats. Let the contents boil for a further 10 minutes. Scoop out and discard the graying floating foam from the water.
  3. Transfer the bones and meat to a strainer and rinse them under the sink. Ensure you remove all the scum (graying floating foam) from the meat.


Roast and Char

  1. Heat your pan to medium-high. Add all the seasonings to the pan and toast them until very fragrant. This should take around 5 to 6 minutes.
  2. Turn off the heat and remove the seasonings. Put the seasonings in a tea bag (or ball infuser) and set them aside.
  3. Add two onions and ginger into a clean pan. Char each side until blackened – this should take around 4 minutes. Turn off the heat and transfer the ginger to a chopping board. Smash the charred ginger until it splits. Alternatively, you can place the onions and ginger in the oven at 4250F (around 2200C) for 25 minutes (remember to flip halfway).


Pressure Cook

  1. Place the parboiled marrow followed by the tendons, brisket, charred onions, and smashed ginger into the pressure cooker. Stack them according to the above order
  2. Add 12 cups of boiling water into the pressure cooker (which will help establish optimal pressure faster). Keep the water under the 2/3 max line (Do not exceed the max line).
  3. Add the seasoning bag on top of the meat (not in the water), followed by the rock sugar and salt.
  4. Place the lid in position and pressure cook on high for about an hour and natural release for half an hour. (Always be cautious when releasing pressure from the pressure cooker)
  5. Once safe, open the cooker and remove the tendons and brisket. Transfer them to a bowl of cold water and let them rest for 15 to 20 minutes or until cool to touch. Remove or discard the bones, ginger, and onion.
  6. Add 8 cups of hot boiling water to the pressure cooker and remember not to exceed the 2/3 max line.
  7. Place the lid in position and pressure cook on high for about 3 minutes, followed by a quick release.
  8. Add the fish sauce to the broth and stir well (season with salt and sugar if necessary). Discard the bag of seasoning.
  9. Optional, although recommended – place a mesh strainer lined with a cheesecloth or coffee filter over a large pot or bowl and slowly pour the stock via the filter. This will reduce the fat and leave a clear pho soup.
  10. Transfer the broth back to the pressure cooker (ensure you clean the instant pot cooker before reusing it).
  11. On the instant pot, press the sauté button and set it to high for 20 minutes.
  12. Add the meatballs to the broth.


Slice Meat

  1. Keep the steak in the freezer for half an hour – it helps make thin meat slices. Cut the steak against the grain into thin slices. Set the pieces aside. Slice the brisket, cover, and set aside. Slice the tendons into quarter or half-inch strips and set them aside. An optional step – slice the meatballs in half.


Cook the Noodles

  1. Add the noodles to a bowl. Add boiling water and blanch for 10 to 12 seconds. Drain the noodles and return them to the bowl. This is the preferred method.
  2. If on a stovetop, halfway fill a medium-size pot with water and bring to a boil. Blanch fresh pho noodles for 5 to 7 minutes in boiling water. If using dry noodles, follow the instructions and cook time on the packaging. Remove and strain the noodles before transferring to a serving bowl.


Assemble and Arrange

  1. Add the cooked noodles to the center of the bowl.
  2. To the bowl, add the sliced steak, brisket, meatballs, tendons, and tripe.
  3. Add sliced white onions and chopped green onions.
  4. Gently add boiling broth over the meat and noodles.
  5. Season with sriracha sauce, hoisin sauce, and lime (to taste). Optionally, you can add more fish sauce if preferred.
  6. Add the cilantro, bean sprouts, sliced Jalapenos, and Thai basil leave to the serving.
  7. Serve immediately and enjoy!

pho-dac-biet-calories


Pho Dac Biet Calories and Nutrition

A hot, comforting serving of pho dac biet packs about everything you want in a soup; filling meat, salty broth, herbs, spices, vegetables, and rice noodles. A medium-sized serving of pho packs around 450 calories. Pho dac biet is also a good source of protein, which is an essential building block for the body. Protein is used to make muscles, organs, tendons, hormones, and other metabolic processes.

The ingredients in pho provide potential health benefits. The bone broth contains chondroitin, glucosamine, and collagen. These ingredients promote the health of your joints. Ginger contains gingerol, an antioxidant substance that reduces inflammation and may ease joint pains. The vegetables and herbs in pho are highly nutritious. The herbs and vegetables like Thai basil, green onions, chili peppers, and cilantro are rich in nutrients and many anti-inflammatory substances.

Chicken Katsu – The Japanese Style Crumbed Chicken [with Recipe]

0


Well.. everyone around the world who’ve had some kind of interaction with Japanese culture will tell you they love it. There’s just something about it that’s so fascinating. From the Japanese hospitality that makes everyone feel at home to their art. Their traditional dressing is also incredibly unique but to a food lover like me, it’s the Japanese cuisine that’s most attractive. Chicken Katsu seems a simple thing to cook, but is more than that.. I can guarantee you that!

Japanese food is actually looked at as a healthier option compared to western food but it is also tastier. From sushi to gyoza or any other food that comes to mind, you will love it. Today though, I would like to talk about a dish called chicken katsu. Have you heard of it before? Well, it’s basically fried chicken that has been made with some panko bread crumbs. The Japanese like to serve it alongside tonkatsu sauce.

Tonkatsu sauce, in case you didn’t know, is a fruit-based type of brown sauce that is also of Japanese origin.  In this article, I will give you details of the origin, the recipe and so much more regarding this chicken katsu dish.

japanese chicken katsu


Japanese Chicken Katsu (Origin and Curiosities)

While it’s great to enjoy a good dish served in front of you, it’s also worth knowing where the dish came from. Well, every great dish has a good story behind it, one that will probably make you appreciate it more. So, where did chicken katsu come from? What’s the magnificent story behind it?

First of all, the term katsu generally refers to a fried meat cutlet or seafood that is the epitome of comfort foods in Japan. It is made with panko bread crumbs which are flaky and well, I must say they are also of Japanese origin. In Japan, katsu is quite popular among people of different ages from children to adults. In appearance, it is quite similar to the German schnitzel.

Safe to say, it is one of the western foods that the Japanese fondly adopted and customized to suit their own local tastes. As a result, it has become a big part of their cuisine.

The katsu comes in different varieties, including the chicken katsu that we’re talking about today. The chicken katsu variation is a boneless chicken crusted with panko crumbs and deep fried accordingly. Several people like their chicken katsu made healthy with some tender chicken breast. That said, you can also use chicken thigh if you want to make it juicier.

Katsu was first created in the late 1800s at a restaurant in Tokyo. They were looking to add a meat cutlet that was more European in style to their menu. Today, you can easily find it in the different variations such as chicken katsu anywhere on the street. You can find it in bento boxes, in different eateries and also in fancy restaurants.

What everyone is always looking for in a dish aside from a delectable taste is its ability to satisfy you. Well, the chicken katsu is highly satisfying. It’s a great treat that can be served alongside some cabbage preferably the finely shredded type, some thick katsu sauce, and a distinct Japanese curry. You can serve these on top of some hot rice or you can serve it as part of a sandwich.

If you go with the latter, it simply means you put it in between thick bread slices.


If you like this article about Mediterranean Food, check also this popular article about Turkish Food


chicken katsudon


Chicken Katsudon

The chicken katsudon is one of Japan’s most popular rice dishes. It’s a dish that balances out sweet tastes and salty ones. The textures of this dish are simply delightful. If you’re a big fan of chicken, then you will appreciate that in the dish, you will find it fried. Sounds tasty right? You will also find a great size of fat rice grains well blended into eggs.

For that finger-licking taste of chicken katsu don, I’ll advise you to eat it hot. The chicken katsudon exists in a number of variations depending on the different regions of Japan. The most popular one though is the one made with a bed of rice and has chicken cutlet toppings simmered in a tasty broth. The broth contains eggs and onions. So, if you’re really keen on avoiding any wastage in the kitchen then this is a nice way to make good use of your leftover cutlets.

Generally, katsudon means a cutlet rice bowl. Funny, it’s often served before one faces a huge challenge in their life just because its pronunciation is quite similar to the pronunciation of the Japanese word for “win.”

Originally, the katsudon was tonkatsu that would be dipped in some sauce and would then be served with some rice. Today, most people will tell you that it’s still unclear how it evolved into the simmered dish we know it to be today. Some will tell you katsu was first made in 1921 at one of the soba restaurants known as Sanchoan.

According to them, this restaurant would serve tonkatsu in the evenings and since the cutlets were not well fried, they would automatically become leftovers. One day as the chef was bemoaning a large amount of these leftovers in the morning, one of the college students who had stopped by told him that he’d eat this uneaten batch of tonkatsu.

He’d only do so if the chef prepared them for him with some egg. He also suggested that after the preparation the chef should serve it over rice, and that’s how things unfolded.


chicken katsu sauce


Chicken Katsu Sauce

Chicken katsu sauce is a barbeque sauce for fried chicken made in Japanese style. It is made predominantly with some Worcestershire sauce, sugar, soy sauce and a few other seasonings. It has a unique taste especially because of the Worcestershire sauce. This sauce is actually both sweet and salty at the same time. Amazing right? It’s also quite thick.

So you can make this chicken katsu sauce by yourself at home. However, if you don’t have much time in your hands you’ll love that the sauce is available in most Japanese stores. So you could just buy yourself some and use it.


chicken katsu curry recipe


Chicken Katsu Curry Recipe

Here comes the most interesting part of this article, the dish preparation. If you’re into Japanese food then you already know that this chicken katsu curry is not only tasty, but it is also generally wickedly wonderful. When compared to several other curries, it stands out because for it, you first have to bread the meat and fry it before you add the delectable silky sauce over it.

This is an amazing comfort food and the best part about it is that you can actually make it by yourself at home.

The recipe below will take you just 15 minutes to prepare, and 30minutes to cook. It will take just about 45 minutes in total for it to be completely ready.

This recipe serves 4. Serve it with some white rice.

Ingredients

For Curry Sauce

  • 2 carrots ( medium size, sliced)
  • 4 teaspoons soy sauce
  • 2 teaspoons honey
  • 5 garlic cloves (chopped)
  • 2 tablespoons sunflower oil
  • 2 onions (sliced)
  • 2 tablespoons plain flour
  • 4 teaspoons curry powder
  • 600ml chicken stock
  • 1 bay leaf
  • 1 teaspoon garam masala


For the Breaded Chicken

  • 4 chicken breast fillets (pounded, 1cm thick)
  • 2 tablespoons plain flour
  • Salt
  • pepper
  • 1 egg (beaten)
  • 100g panko breadcrumbs
  • 230ml vegetable oil


chicken-katsu


Method

  1. To make the curry sauce, start by heating the oil in a saucepan. Ensure it is medium in size and that it’s a nonstick pan. In it, add your onion and some garlic then cook them until they are soft enough. Grab your carrots and add them into the mixture. Cook it over low heat for about 10 to 12 minutes.
  2. Next, add in some floor and curry powder then cook for a minute. Slowly stir it in the stock until it is well mixed. To the mixture add in some soy sauce, honey, and bay leaf then boil slowly.
  3. Turn the heat down and allow the mixture to simmer for 20 minutes or just until your sauce is thick. It should still have a pouring consistency.
  4. Add the garam masala then stir it in. Sieve the curry sauce then return it to the saucepan you were using. Keep it there over low heat until you’re ready to serve.
  5. Start seasoning both sides of the chicken breasts using both the salt and pepper. These will give the chicken an even richer taste. In separate bowls, place your egg, flour and breadcrumbs then arrange them in a row.
  6. Coat your chicken breasts in the flour, then dip them in the egg and finally coat it in breadcrumbs. Make sure you’ve covered both sides.
  7. Grab a large frying pan and in it heat some oil. Ensure you do so over medium heat. Place your chicken into the hot oil and then cook till golden brown. Ensure you do the same on both sides for about 3 to 4 minutes. Once it’s cooked, place the chicken on some kitchen paper for the oil to be absorbed.
  8. Pour the curry sauce over the chicken.


Can you believe it’s that easy to make? Just a few steps and short minutes and you will be enjoying this amazing Japanese dish. There are still some things you could do while preparing your chicken katsu curry. Look at them as a few more tips. They include:

  • Making a batch. This chicken katsu curry recipe is a great one for a batch dish. All you need to do is double the quantities for the ingredients. Once you have cooked the dish, you can always freeze the remaining bit that you did not serve until the next time you will need to eat it. Should you feel the urge to eat some chicken katsu, all you need to do is defrost the chicken and the sauce and then warm it. Imagine this, if you usually keep some cooked rice in your cupboard, you will easily have your dinner ready in just a few minutes. Perfect if you’re hungry right?
  • Younger kids and even toddlers who are just starting to get used to eating solids can eat this meal. For them though, pick a very mild type of curry powder and significantly reduce the amount you use. You should also chop the chicken into little bits and ensure both the cucumber and carrots are served slim.
  • If you feel the need to add some protein into the dish, you can always go for a tablespoon of peanut butter. Add this into the sauce for the extra protein.
  • You can also use a bat to tenderize the chicken breast further. This also makes it more even.
  • If you’re looking to add something more savory to the dish, you could try adding some soy sauce. You will love the taste.
  • You can use a variety of vegetables to make your sauce even thicker. The vegetables also make the dish healthier.
  • Adding miso to the sauce gives it even more depth.
  • If you like to present your food with some contrast then why not go for the freshest option? A good idea on how to achieve this would be to serve it with a side salad.
  • If you prefer an even more velvety or smoother consistency pass the sauce in a blender or a smoothie maker before sieving it.

With this dish you are highly likely to join the long list of people that absolutely love Japanese food. It’s a dish with the right balance of both sweet and slightly salty tastes that will leave you wanting more. It has a distinct taste, one that’s unforgettable. The dish is also great if you like to include as many healthy ingredients as possible while you cook. Most of all, the dish has an amazing history that you can share with those who will be enjoying your cooking.

Chicken Karahi – Is this delicacy one of the best dishes in Pakistan? [with Recipe]

0


Pakistani Food is not that well known Worldwide but i can assure you is absolutely great and worth it to try. If you enjoy cooking then you probably will appreciate Chicken Karahi as trendy food to prepare.. the fact that there are so many ways of preparing chicken, all of them bringing out delicious results.

You also probably appreciate that it can be presented in a variety of ways, keep in mind that the way you present your food goes a long way in making people want to eat it more. That said, have you ever heard of Pakistani chicken karahi?

Well, today, that is what i’m talking about and well this amazing dish will have you wanting more and more. I give you its history and talk so much more about it including a special recipe.


chicken-karahi-pakistani


Pakistani Chicken Karahi (Origin and Curiosities)

Pakistani chicken karahi as the name suggests has its origin in Pakistan. However, in order to fully understand this dish, we have to break its name down.

First it was given the name karahi because of the pan that it was originally prepared in. This pan is heavy and really resembles a wok although it is a bit rounder and has a flatter base. In the past, people used this pan for simmering meat or would stir fry it in an open fire. This pan gives more than enough surface area for cooking the dish in high heat.

Karahi is believed to have originated specifically from Khyber Pakhtunkhwa which is formerly the northern frontier of Pakistan. Chicken karahi is unique and the distinguishing features are its tomato like base and its fragrance as well as the finishing cilantro, green chili peppers, and slivers of ginger.

Karahi being from the Indian subcontinent is spicy and the ingredients used in preparing it includes chicken, onions, tomatoes, coriander, cumin, red pepper, garlic, cilantro and ginger. This is for general karahi preparation but for the Pakistani variation, no onions are used. Preparing this dish is said to be easy and fast, taking just about 30 to 50 minutes.


karahi_pakistan_india


Karahi in Pakistan and India (Main Differences)

As you can imagine when a new dish comes up, various people will sample it. When they find it tasty, they will want to spread the word about it to many other places and share it with friends. This is the same with chicken karahi.  Today, there are different variations of it and it depends on where it is being cooked and the family that’s preparing the dish for you.

When you eat the Indian Karahi and the Pakistani karahi, you will notice some differences. The most notable one that exists between Pakistani chicken karahi and Indian chicken karahi is in how the dish is made.

In North India, this dish is made to include green pepper and onion. However, in Pakistan, they do not include these in the preparation.


chicken-karahi-curry


Karahi Curry Varieties

As has already been mentioned, the traditional karahi from Pakistan has gone through several changes overtime. People have changed it up for many various reasons. For example, to cut costs, many restaurants that prepare this meal have included onions in the list of ingredients used to prepare it.

In fact, so many people today are not even aware that the original recipe did not include onions. There are also different variations that include capsicum and large chunks of red onions. Others use things that make for modern day conveniences. Examples include canned tomatoes and also pre-packaged ginger jars. In some areas, garlic is common too in karahi curry.

That said, the most popular variations are Pakistani karahi curry and also the Indian karahi curry.


chicken-karahi-recipe


Chicken Karahi Recipe

We did mention that making chicken karahi is not such a long or difficult process. Here’s a recipe to follow in case you are interested in trying out this very popular Asian dish:


Ingredients

  • 2 tbsp ghee
  • 2 tbsp neutral oil (alternatively you can use sub more ghee)
  • 1 onion (finely chopped)
  • 8 garlic cloves (preferably crushed)
  • ¾ inch ginger (crushed)
  • 1-2 Serrano/ Thai green chili peppers (whole)
  • 2 pounds skinless bone-in chicken
  • 8 small tomatoes (diced)
  • ¼ cup plain whole milk yogurt (whisked)
  • 1 tsp black peppercorns (freshly ground)
  • ½ tsp garam masala
  • 2-3 green chili peppers (slit into half)
  • 1-2 tbsp fresh ginger(julienned)
  • 1tbsp fresh cilantro (chopped)
  • 2 tsp coriander powder
  • 1 tsp cumin powder
  • 1 tsp red chili powder
  • 2tsp kosher salt (divided)


Method

  1. Grab a large pan, preferably a heavy-bottomed one and place over high heat. In it, add some ghee and oil. Once hot enough, put inside the pan some onions and then allow them to sauté for about 5 to 6 minutes or until they turn slightly golden. Add in some ginger, garlic and some whole green chili pepper then sauté this for about a minute.
  2. Next, add in the chicken then ½ tsp of salt. Sauté this for about 5 minutes. Ensure the chicken color changes and that it’s no longer releasing any water. Add in the tomatoes, cumin, coriander, red chili pepper and the amount of salt you have left. Sauté this mixture for another one minute.
  3. Lower the heat and ensure it gets to medium then cover the mixture. Allow this chicken to cook for about 20 minutes ensuring that you stir it at least once in between.
  4. After this, you can raise the heat back to high. Allow the mixture to sauté some more for about 10 minutes so that the chicken is completely cooked and that the excess liquid is reduced. The chicken will start to have a glossy appearance when the ghee or oil used begins to separate.
  5. Once again, lower the heat to medium then in the mixture, add the whisked yogurt. Gently sauté it for between 2 and 3 minutes. At this point, you can taste it just to ensure that there’s enough salt then add in the freshly ground black peppercorns. Also, add in the garam masala and stir in properly so that they combine accordingly. Top this with some green chili peppers, cilantro and the julienned ginger.
  6. Serve your chicken karahi hot alongside some naan, rice or roti


As you can see, this is a very easy recipe to follow and you don’t need to go to all the way to either Pakistan or India. All you need to do is grab the necessary ingredients from your nearest grocery shop or supermarket and you’ll be good to go. However, you can follow the tips below to make your chicken karahi even better:

  • Use fresh tomatoes preferably those that are still firm. You know, the ones that make that great sound when you start slicing them.
  • Whether or not you’re a big fan of tomatoes, make sure you use the correct ratio of chicken to tomatoes. The weight of the chicken should guide you.
  • Avoid cooking the chicken karahi with the lid on.
  • You should also keep in mind that you do not need to add in any water while preparing the chicken karahi. Avoid adding in any even if you feel tempted to. Both the chicken and tomatoes will produce a lot of their own liquid that will enable the dish to cook well as required.
  • It’s always better to go for the short and fat, more bulleted chili instead of picking the slimmer and longer variation. The reason is that these chilies are more for their great smell and not their heat so it’s best to pick the milder variation.
  • Since no onions are used in the curry preparation, karahi goes so well when served with a salad that is made with raw onions.
  • It’s important to finely chop the tomatoes because this allows them to break down faster. It also ensures you do not have large chunks of tomato skin on your curry.
  • Although there is the option of using oil, ghee is the best option as it gives your food a rustic flavor which goes very well with everything else that has been included in the preparation of the karahi.
  • Although this dish does not exactly involve the use of water, should you choose a smaller pan you will notice that you end up with too much liquid in the cooking process. If this is the case, take out some of the liquid into a smaller pan and cook it down before returning it to the chicken. This way, the chicken will not get too tender.
  • If you’re not a big fan of julienned ginger in your karahi curry, you can add some crushed ginger instead but do it in the beginning.


So, if you are a big chicken lover, go ahead and make this dish at home. You will most certainly enjoy it along with some of your friends and even family members. There’s a reason why it is so popular in Pakistan don’t you think? It’s simply delicious.

Peanut Butter Chicken – American or Asian Dish? [Curiosities and Recipes]

0


Peanut butter chicken is an American dish that has become increasingly popular in recent years. Usually, the recipe consists of chicken, peanut butter, and any number of additional ingredients that are either mixed into the peanut butter or spread on top of the cooked chicken before serving.

Once you try it, you’ll understand why peanut butter chicken has become so well-loved over the years! If you never tried it, you are missing out on one of the most popular and nutritious dishes around the world. Peanut butter chicken recipes are easy to prepare as they don’t need many ingredients.

To better discover this dish we need first to clarify that exist different variants of Peanut Butter Chicken in the World, so I will try to lay them out for you.

This delicacy is a balanced dish that is enjoyed by both children and adults alike. Weight trainers prefer the dish as it helps them gain pounds or lose weight while exercising, depending on how they use it.

Additionally, it can help boost a person’s blood sugar level and cardiac health. However, this dish is rich in calories, and therefore, people should enjoy it in moderation.

Let’s dive into where this Dish originates from, find out all the different versions around the world, and some great recipes.


Peanut Butter Chicken Varieties in Asia

Butter chicken is the most popular meat dish in Asia as in the rest of the world. From India to Thailand and China to Singapore, they prepare chicken in various ways, including boiling, steaming, poaching, and deep-frying.

Chicken is among the part of Singapore’s national dishes, the Hainanese chicken rice, which came into the country through southern Chinese island immigrants.

The combination of chicken and peanut butter makes for an exciting combo. Because Asia is so large, there are many regional varieties in preparing recipes bearing the two ingredients. Other than the methods of preparation, there are a wide variety of spices to choose from.

One of the most common ways of preparing peanut butter chicken is to make satay. This is a peanut butter sauce that is popular all over Asia, although it has different names according to the region. It can be used as a dipping sauce for chicken dishes or as a salad dressing.

However, this peanut sauce’s most popular use is to use it to flavor skewered chicken pieces, which are then barbequed. This method initially came from the Middle East, although their meat of choice is beef. In Asia, it is Chicken or pork.

Another common way to use peanut butter in the preparation of chicken is to make a marinade. The strength of the flavor depends on how long the chicken pieces sit in the peanut butter marinade.

The marinade’s spices and ingredients are often regional, with the Thai, Chinese and Indian being amongst the more widely known.

Peanut butter chicken wraps are a popular snack in Asia. Some varieties will use peanut butter, but it is not uncommon to find whole peanuts used for a crunchier taste.

The wraps come in the form of tortillas stuffed with chicken pieces. Sometimes, the wrap is made from veggies such as lettuce.

Another popular Asian peanut chicken dish is the or galinha à Africana, a Macau dish inspired by Portuguese and African cuisine. It is prepared with barbecued chicken coated with a sauce made of coconut milk, peanuts, shallots, paprika, and grated coconut.

All in all, there are a wide variety of exotic chicken and peanut butter dishes you can get in Asia.  Whether you like hot and spicy food or milder flavors, you are sure to find an Asian peanut butter chicken dish to suit your palate.

indian curry


Peanut Butter Chicken Varieties in America

Peanut butter is one of those foods that define America. It is not only eaten on toast but is also common in cooking. American cuisine is a blend of native ingredients and cooking methods blended with cooking styles and ingredients from colonialists and immigrants. There is also the influence of West Africa in the African American cooking of peanut butter chicken.

The peanut butter sauce or stew is a dish that has an African influence. The chicken pieces added to the pot makes for a warm and tasty accompanying dish to rice or bread. Of course, peanut butter stew can have a variety of other ingredients.

Roast chicken is primarily a European influence in the preparation of chicken. However, American influence has brought peanuts into the mainstream as some of the ingredients used to marinate chicken. In other instances, peanut butter sauce is used as a dip for meals that include chicken.


fried peanut butter chicken


With many immigrants of Asian origin, it was always a matter of time before their cooking and dishes joined mainstream American cuisine. Peanut butter chicken satay is no longer a rarity in America thanks to Asian immigrants.

The Latino population has also contributed to the variety found in American cuisine. One of the most widely known snacks is the tortilla. Others include burritos and tacos. These foods can incorporate chicken and peanuts, or people can eat them with a peanut butter-based dip.

So, as is apparent, the chicken and peanut butter dishes in America are as diverse as the nationalities and races that make up the USA. You will be spoilt for choice in America from sauces, stews, wraps, and marinades that incorporate chicken and peanut butter.


peanut butter chicken sauce


Chinese Peanut Butter Chicken

It is unknown where exactly in China or even who first created it, but many believe that it was invented during the 20th century around Shanghai a time when meat was scarce and sugar was expensive. Some think that cooks created an easy alternative with sugar-coated peanuts (and later switched to honey) as well as thick gravy to cover up any remaining flavors.

Another story suggests that soldiers stationed near battle sites ate scraps from cooking pots, which may have been too small for large amounts of meat or vegetables, leading them to mix these items together without having any idea what they were creating.


chinese-peanut-butter-chicken


Peanut Butter Chicken Sauce

Chicken doesn’t have to sound dull and lame. Not when you add a twist to this wholesome dish by marinating the chicken in rich, creamy peanut sauce. The result is a nutty, soy sauce heavenly goodness in one dish. Then, put the marinated chicken pieces onto skewers and grill them for a finger-licking meal. Here is an easy recipe for peanut butter sauce recipe for making chicken marinade.


Peanut Butter Chicken Marinade Recipe

Turn your chicken into a deliciously creamy dish. The peanut marinade is easy and will not take you a lot of time to prepare. You will need a big bowl to hold all the chicken and the marinade.


Ingredients

  • Creamy peanut butter- go for a natural variety with no added palm oil or sugar
  • Soy sauce- look for a low-sodium variety which still has enough salt to make your dish even healthier
  • Garlic- use fresh cloves. Try grating or mincing them for easy mixing white vinegar.
  • Toasted sesame oil- ensure it is toasted for that perfect peanut sauce marinade
  • Green onions-use only the light green and white parts and save the dark green ends for garnish
  • Ground ginger- for easy distribution, go for the powder instead of fresh ginger root. However, the powder should be fresh from the grocery store.
  • Cilantro- you can skip it if you don’t like its taste


Method

Mix all these ingredients plus the chicken in a big bowl and let it sit for at least an hour before putting the chicken pieces onto the skewers for grilling. Brush the chicken with any left-over marinade to avoid wasting any juicy ingredients as they will add a rich flavor to your dish.


peanut butter chicken thai


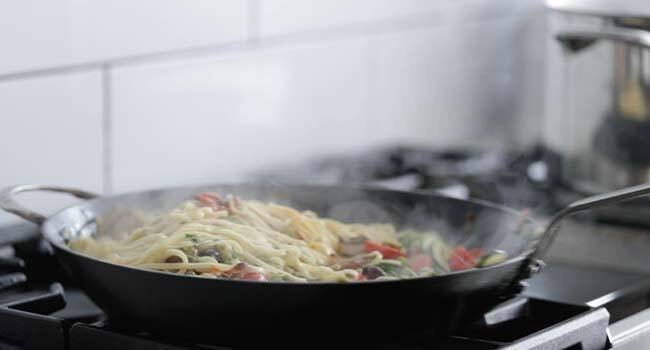
Peanut Butter Chicken Thai Recipe

Thai peanut butter chicken is an Asian-inspired delicacy made with broccoli and chicken in a spicy peanut sauce. For those who prefer fewer spice foods, you can use less cayenne.

However, if you love the burn, use as much as your palate allows. You can also use low sodium soy sauce if you don’t fancy salty food. You can prepare Thai peanut butter chicken in two ways. You could choose to eat it with rice or vegetables, such as broccoli. Here is a simple recipe on how to prepare this delicious popular dish.


Ingredients

  • 1 ½ pounds skinless, boneless chicken breasts
  • 1 tbsp. corn starch
  • 1 egg white
  • 1tbsp. rice vinegar
  • 2 tbsp. coconut oil
  • 1-2 tbsp. red curry paste
  • 1 bunch of broccoli
  • 2/3 cup peanut butter
  • 1 medium red onion diced
  • 2 tbsp. brown sugar
  • 2 cloves garlic minced
  • 1 ½ tbsp. fresh ginger finely chopped
  • 1 ½ tsp. turmeric
  • ½ medium red onion
  • 2 cups chicken broth
  • 14 ounces of coconut milk
  • ¼ cup low-sodium soy sauce


For Garnishing

  • Fresh lime wedges
  • Chopped peanuts
  • Sesame seeds
  • Cilantro, Thai basil, or mint


Cooking Instructions

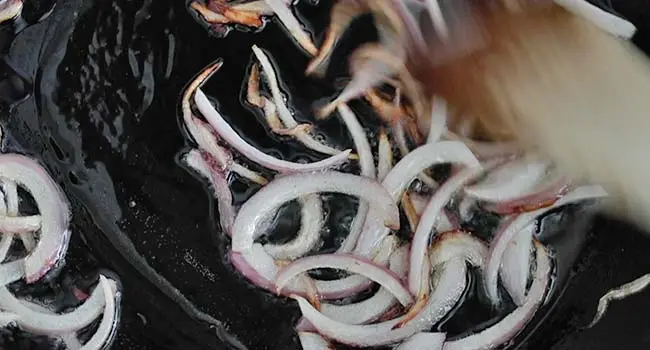
  1. Cut the chicken into bite-size pieces. Combine rice vinegar, corn starch, and egg white in a bowl and whisk until well combined. Add chicken pieces and coat them. Keep refrigerated for 20 minutes as you prepare the sauce and veggies.
  2. Slice broccoli stems thinly and cut all large florets into smaller pieces.
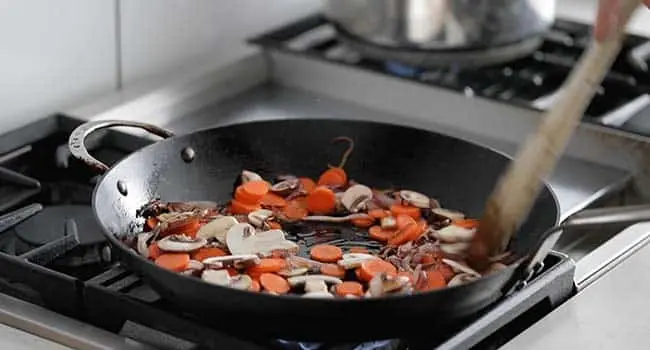
  3. Heat 1 tbsp. coconut oil in a pot or Dutch oven over medium heat. Add the broccoli and stir for a minute. Add a pinch of salt and the diced red onion and keep cooking. Stir occasionally for another minute. Remove the veggies and set aside in a bowl.
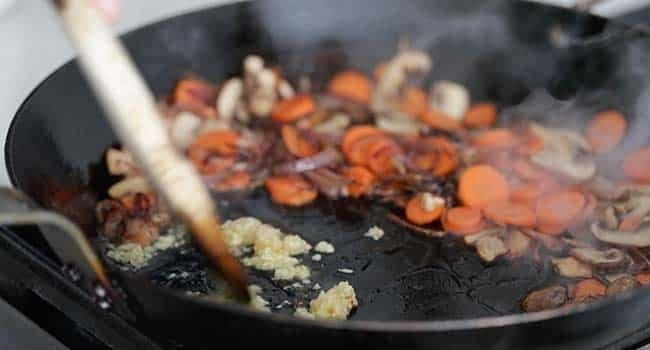
  4. Heat the remaining coconut oil in the same pot and add peanut butter, red curry paste, ginger, brown sugar, garlic, red chopped onions, and turmeric. Cook for two minutes while stirring occasionally.
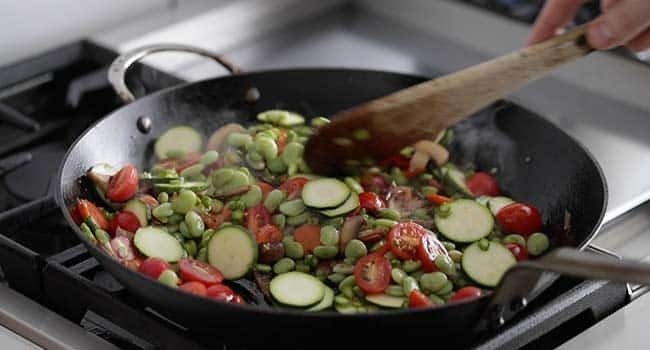
  5. Add the coconut milk slowly while stirring until smooth. Add the soy sauce and chicken stock and bring to a boil. Reduce the heat to a simmer and keep stirring. Cook uncovered for ten minutes.
  6. Add the chicken with the marinade and cook to a boil. Cook for five minutes and turn off the heat. Keep the pot covered for five more minutes. Add the red onion and broccoli and stir gently.

Serve with black, brown, or white rice and lime wedges. Garnish the dish with fresh cilantro or mint, Thai basil, sesame seeds, and halved or chopped peanuts.


fried-peanut-butter-chicken


Fried Peanut Butter Chicken

If you’re a fan of fried food, Fried Peanut Butter Chicken is a great option when you want to serve something new to your family or even an evening meal with friends. Tender chicken breasts are coated in a rich blend of peanut butter, honey, soy sauce, garlic, and other delicious flavors such as Curry, Turmeric, and Paprika, then coated in crunchy cornflakes before being fried.

It’s served on top of creamy mashed potatoes which add another layer to its wonderful flavor. This is a great recipe for any time that you need to impress dinner guests or just want to try something new for dinner. The creamy mashed potatoes serve as an excellent side for it too so don’t forget about them when making it, especially with some gravy.


chicken-korma-vs-butter-chicken


Chicken Korma Vs Butter Chicken

It’s not uncommon for people to get confused between chicken korma and butter chicken. They are both Indian curries that use chicken in their recipe and they are very similar, but they also have key differences. Butter chicken is generally thicker than korma and also sweeter.

Korma is usually made with yogurt, coconut milk, and nutmeg. The meat used in korma can vary depending on what part of India you’re from, but chicken or lamb are typical options. Butter chicken is typically made with cream rather than yogurt or coconut milk; it also uses tomato paste which gives it a much different taste than a korma.

Easy Grilled Lamb Ribs Recipe

0

This straightforward recipe promises a symphony of flavors as tender lamb ribs meet the smoky embrace of the grill. With a marinade of garlic, fresh herbs, and a touch of paprika, each bite unveils a savory medley that celebrates the natural richness of lamb.

Whether you’re firing up the grill for a casual weekend feast or impressing guests with a flavorful centerpiece, these grilled lamb ribs are a delicious ode to simplicity and satisfaction.


Serving: 2

Ingredients

  • 2 pounds lamb ribs
  • 3 cloves garlic, minced
  • 2 tablespoons olive oil
  • 1 tablespoon fresh rosemary, finely chopped
  • 1 tablespoon fresh thyme, finely chopped
  • 1 teaspoon paprika
  • Salt and black pepper to taste
  • Lemon wedges for serving

Preparation

Marinate the Lamb Ribs

  1. In a bowl, combine minced garlic, olive oil, chopped rosemary, chopped thyme, paprika, salt, and black pepper.
  2. b. Rub the lamb ribs with the marinade, ensuring they are evenly coated. Allow them to marinate for at least 1-2 hours or overnight in the refrigerator for more flavor.


Grill the Lamb Ribs

  1. Preheat your grill to medium-high heat.
  2. Remove the lamb ribs from the refrigerator and let them come to room temperature.
  3. Place the ribs on the preheated grill. Grill each side for about 8-10 minutes, or until the ribs reach your desired level of doneness.
  4. Baste the ribs with any remaining marinade during grilling for extra flavor.
  5. Once done, transfer the lamb ribs to a cutting board and let them rest for a few minutes before slicing.
  6. Slice the grilled lamb ribs between the bones.
  7. Serve the lamb ribs on a platter with lemon wedges on the side.


Garden Salad

Ingredients

  • 4 cups mixed salad greens (lettuce, spinach, arugula, etc.)
  • 1 cup cherry tomatoes, halved
  • 1 cucumber, sliced
  • 1 bell pepper (any color), thinly sliced
  • 1/2 red onion, thinly sliced
  • 1/4 cup feta cheese, crumbled
  • 1/4 cup Kalamata olives, pitted and sliced
  • 2 tablespoons extra virgin olive oil
  • 1 tablespoon red wine vinegar
  • 1 teaspoon Dijon mustard
  • Salt and black pepper to taste


Preparation

  1. In a large salad bowl, combine the mixed greens, cherry tomatoes, cucumber, bell pepper, red onion, feta cheese, and olives.
  2. In a small bowl, whisk together olive oil, red wine vinegar, Dijon mustard, salt, and black pepper.
  3. Drizzle the dressing over the salad and toss gently to coat the ingredients evenly.


Enjoy this well-balanced and flavorful meal of Grilled Lamb Ribs with a vibrant Garden Salad! The juicy lamb pairs perfectly with the freshness of the salad, creating a delightful dining experience.


Easy Wagyu Donburi Recipe

0

This simple yet exquisite rice bowl showcases the unparalleled richness and tenderness of thinly sliced Wagyu beef, harmoniously married with a delectable tare glaze.

As each slice of marbled perfection meets the warmth of Japanese rice, this Wagyu Donburi promises an experience that transcends ordinary meals. Brace yourself for a symphony of flavors that elevate the humble rice bowl to an indulgent affair, bringing the essence of Wagyu to your home kitchen.


Serving: 2

Ingredients

For the Wagyu Beef

  • 300g Wagyu beef slices (sirloin or ribeye), thinly sliced
  • 2 tablespoons soy sauce
  • 1 tablespoon mirin
  • 1 tablespoon sake
  • 1 tablespoon sugar
  • 1 teaspoon grated fresh ginger


For the Donburi Bowl

  • 2 cups cooked Japanese rice
  • 1/2 cup thinly sliced green onions (for garnish)
  • 2 tablespoons pickled ginger (optional, for serving)
  • Toasted sesame seeds (for garnish)
  • Nori strips (seaweed strips, for garnish)


For the Tare Sauce

  • 1/4 cup soy sauce
  • 2 tablespoons mirin
  • 1 tablespoon sake
  • 1 tablespoon sugar


Preparation

Prepare the Tare Sauce

  1. In a small saucepan, combine soy sauce, mirin, sake, and sugar for the tare sauce.
  2. Heat over medium heat until the sugar dissolves. Allow it to cool.


Marinate the Wagyu Beef

  1. In a bowl, mix soy sauce, mirin, sake, sugar, and grated ginger to create a marinade.
  2. Lay the Wagyu beef slices in a shallow dish and pour the marinade over them. Ensure each slice is well-coated.
  3. Allow the beef to marinate for at least 30 minutes, allowing the flavors to infuse.

Cook the Wagyu Beef

  1. Heat a skillet or griddle over medium-high heat.
  2. Remove the Wagyu slices from the marinade and cook them briefly on each side (about 30 seconds to 1 minute) until they are seared and cooked to your desired level of doneness.
  3. Set the cooked Wagyu beef aside.


Prepare the Donburi Bowls

  1. Divide the cooked rice into serving bowls.
  2. Arrange the cooked Wagyu beef slices on top of the rice.

Make the Tare Glaze

  1. In a small saucepan, heat the tare sauce until it thickens slightly.
  2. Assemble the Wagyu Donburi
  3. Drizzle the tare glaze over the Wagyu beef and rice.
  4. Garnish with thinly sliced green onions, pickled ginger, toasted sesame seeds, and nori strips on top.


Indulge in the richness of this Wagyu Donburi, where the tender beef meets the savory tare glaze, creating a symphony of flavors that’s nothing short of extraordinary.

Easy Tenderloin Burger Recipe

0

Get ready to elevate your burger game with a culinary delight that’s all about premium taste and tenderness – the Tenderloin Burger. This straightforward yet sumptuous recipe takes the classic burger to a whole new level, featuring finely ground beef tenderloin seasoned to perfection.

With minimal ingredients and maximum flavor, it’s the go-to option for those who appreciate simplicity without compromising on quality. Ready to savor a burger that melts in your mouth with every bite? Let’s dive into the easy steps of creating your own Tenderloin Burger masterpiece!


Serving: 2

Ingredients

For the Burger Patties

  • 1 pound beef tenderloin, trimmed and finely ground
  • 1/4 cup breadcrumbs
  • 1/4 cup finely chopped onion
  • 2 cloves garlic, minced
  • 1 tablespoon Worcestershire sauce
  • 1 teaspoon Dijon mustard
  • Salt and black pepper to taste
  • Olive oil for cooking

For the Burger Assembly

  • Burger buns
  • Lettuce leaves
  • Sliced tomatoes
  • Red onion rings
  • Cheese slices (optional)
  • Pickles (optional)

For the Sauce

  • 1/2 cup mayonnaise
  • 2 tablespoons ketchup
  • 1 tablespoon Dijon mustard
  • 1 teaspoon pickle relish
  • Salt and pepper to taste


Preparation

Prepare the Burger Patties

  1. In a large mixing bowl, combine the ground beef tenderloin, breadcrumbs, chopped onion, minced garlic, Worcestershire sauce, Dijon mustard, salt, and black pepper.
  2. Gently mix the ingredients until just combined. Be careful not to overmix, as this can result in dense patties.
  3. Divide the mixture into equal portions and shape them into burger patties. Make an indentation in the center of each patty with your thumb to prevent them from puffing up during cooking.


Cook the Burger Patties

  1. Preheat a grill or a skillet over medium-high heat. Brush the patties with a little olive oil on both sides.
  2. Cook the patties for about 4-5 minutes per side for medium doneness, adjusting the time based on your preferred level of doneness.
  3. Optional: Add cheese slices on top of the patties during the last minute of cooking to melt.


Prepare the Sauce and Assemble

  1. In a small bowl, whisk together mayonnaise, ketchup, Dijon mustard, pickle relish, salt, and pepper. Adjust the seasoning to taste.
  2. Toast the burger buns on the grill or in a toaster.
  3. Spread a generous amount of the sauce on the bottom half of each bun.
  4. Place a lettuce leaf on the sauce, followed by a burger patty.
  5. Add sliced tomatoes and red onion rings on top of the patty.
  6. If desired, add pickles and additional sauce.
  7. Top with the other half of the bun.


Serve and Enjoy

Serve the tenderloin burgers immediately, and enjoy the juicy, flavorful goodness!

This recipe creates tender and succulent burger patties with a perfect balance of flavors, complemented by a delicious sauce.

Customize the toppings according to your preferences and savor the gourmet experience of a tenderloin burger!

Shepherd’s Pie – A Hearty Culinary Hug in Every Bite

0

Welcome to the cozy world of Shepherd’s Pie—where mashed potatoes meet savory ground meat and a medley of vegetables, creating a symphony of flavors that feels like a warm, culinary hug. In this detailed exploration, we’ll journey through the origins, the art of crafting the perfect pie, and why Shepherd’s Pie has secured its place as a timeless comfort food.


shepherds_pie_origin


Shepherd’s Pie Origin

The origin of Shepherd’s Pie can be traced back to the late 1700s in the rural landscapes of the British Isles, where practicality and resourcefulness birthed this enduring culinary creation. Originally conceived as a clever solution to repurpose leftover roasted meat, particularly lamb, Shepherd’s Pie became a staple in the diet of shepherds tending to their flocks in the British countryside.

The dish epitomized the ingenuity of these pastoral communities, offering a satisfying and hearty meal by combining minced or ground lamb with simple vegetables. As a testament to its thrifty beginnings, Shepherd’s Pie showcased the ability to transform modest ingredients into a comforting masterpiece, ultimately becoming a timeless classic that transcended its rural origins to capture the hearts and palates of people around the world.


shepherds_pie_making_insights


Shepherd’s Pie Making Insights

At its core, Shepherd’s Pie is a simple yet satisfying dish. The classic ingredients include ground meat (lamb or beef), onions, carrots, peas, tomato paste, and a rich beef or vegetable broth. The star of the show, of course, is the creamy mashed potato topping, providing the perfect contrast to the savory filling.

Crafting the Filling
The magic begins with a sauté of onions, creating a fragrant base for the filling. Ground meat joins the party, browning to perfection and soaking up the flavors of garlic, thyme, and rosemary. Carrots and peas add a burst of color and sweetness, while tomato paste and broth infuse the filling with depth and richness. It’s a dance of textures and tastes that ensures each bite is a delight.

Mashed Potato Mastery
The crown jewel of Shepherd’s Pie is undeniably the mashed potato topping. Whipped to velvety perfection, the potatoes are spread generously over the flavorful filling. Some enthusiasts even take it up a notch by adding cheese to the mashed potatoes, creating a golden and indulgent crust when baked.


shepherds_pie_recipe


Bringing It All Together
The assembled Shepherd’s Pie is then baked in the oven until the mashed potato topping develops a golden hue, and the filling bubbles with savory goodness. The aroma that fills the kitchen is a promise of the comforting delight that awaits.

Variations and Personal Touches
While the classic Shepherd’s Pie remains a timeless favorite, chefs and home cooks love to add their personal flair. Some experiment with different meats, like lamb or turkey, while others play with herbs and spices for a unique twist. Vegetarian versions with lentils or mushrooms have also become popular, catering to diverse dietary preferences.

Serving and Pairing
A piping hot slice of Shepherd’s Pie is a complete meal in itself, but it pairs wonderfully with a side of green salad or steamed vegetables. It’s the kind of dish that warms your soul on a chilly evening and makes any gathering feel like a cherished family dinner.


[rank_math_rich_snippet]